Here, by the way, are some pretty poppies that Miss Seven grew (yes, she's been a Miss "Seven" for a while now...just shows how slack my blogging has been!). Poppies are by far her favourite flower to grow, though unfortunately we had a bit of a heatwave that killed many seedlings and we only ended up with a few adult plants. They still put on a pretty display for us though and it was extra exciting to come down into the garden in the early morning each day to see whether any new poppies had burst open at first light.
Showing posts with label Garden. Show all posts
Friday, February 3, 2012
Hello Again!
I've been having a blogging break while getting to know the newest addition to our household. It's a bit exhausting, this baby business - especially since I havn't done it all for a while. But lovely at the same time. Things are beginning to settle into kind-of-a, sort-of-a, somehow routine now, so hopefully I will be able to get back to blogging a little more! I've missed it.
Here, by the way, are some pretty poppies that Miss Seven grew (yes, she's been a Miss "Seven" for a while now...just shows how slack my blogging has been!). Poppies are by far her favourite flower to grow, though unfortunately we had a bit of a heatwave that killed many seedlings and we only ended up with a few adult plants. They still put on a pretty display for us though and it was extra exciting to come down into the garden in the early morning each day to see whether any new poppies had burst open at first light.
Wednesday, December 1, 2010
How To Make A Terrarium
I've been wanting to make some terrariums for ages after finding some fabulous old bottles complete with glass stoppers at a local thrift store. (Those are the two at the back. The one at the front is an old coffee bottle with a plastic base on the stopper)
I've also been inspired by some beauties I've seen on the internet (apparently they were all the craze overseas a few years ago! How the heck did I miss that?) and the universe was definately telling me it was meant to be when I discovered this old book straight out of the 70's in my Mum's huge bookshelf.
I just love the line drawings and diagrams in it. They make me want to draw similar things and maybe even break out my colour pencils or watercolours. Which completely reminds me of Geninne's blog and the beautiful paintings of terrariums which she creates.
So if you'd like to create a terrarium of your own, there are a few things you'll need.
Glass containers (if they are small, make sure they are shallow enough that you reach and manipulate what's inside with your fingers, if they are tall, make sure your hand can fit through the opening!)
Pebbles or small rocks
Larger pebbles, shells, wood pieces, plastic animals - whatever takes your fancy to accessorise your terrarium
Charcoal (garden supply or aquarium supply shops will have this)
Peat or Sphagnum Moss (optional)
Potting mix
Small plants
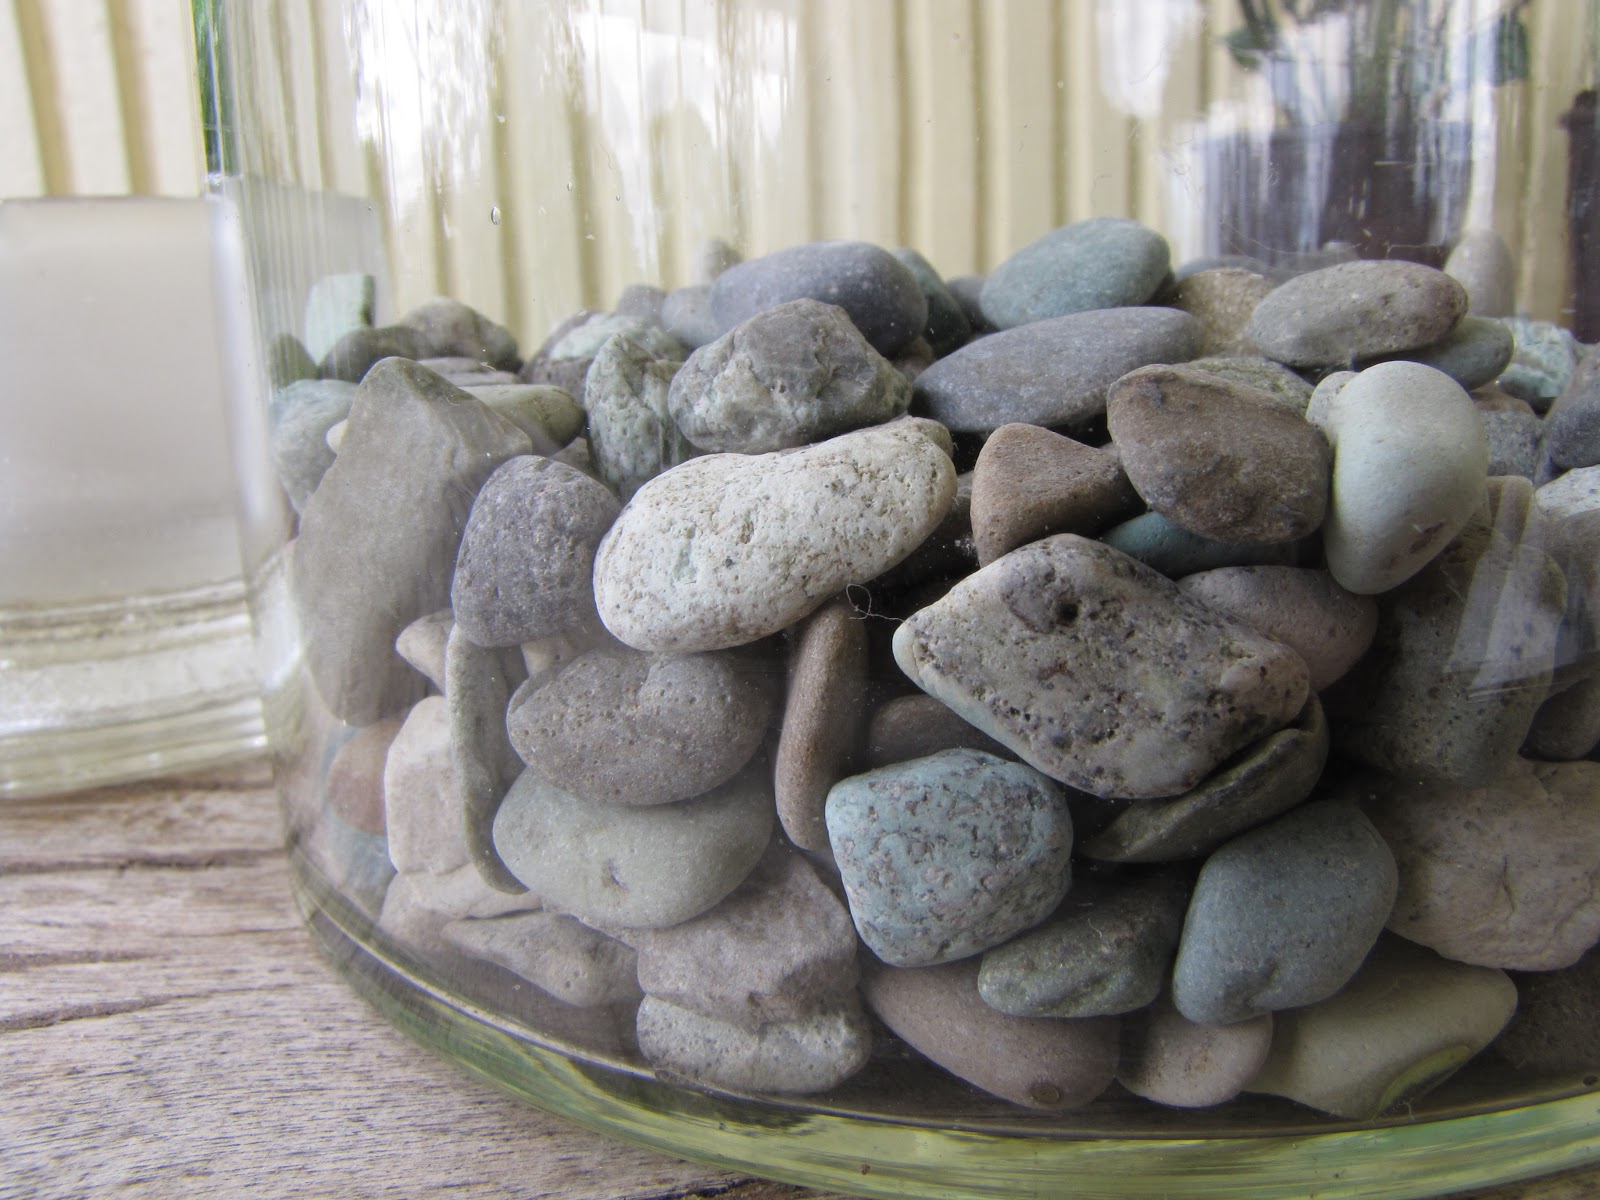
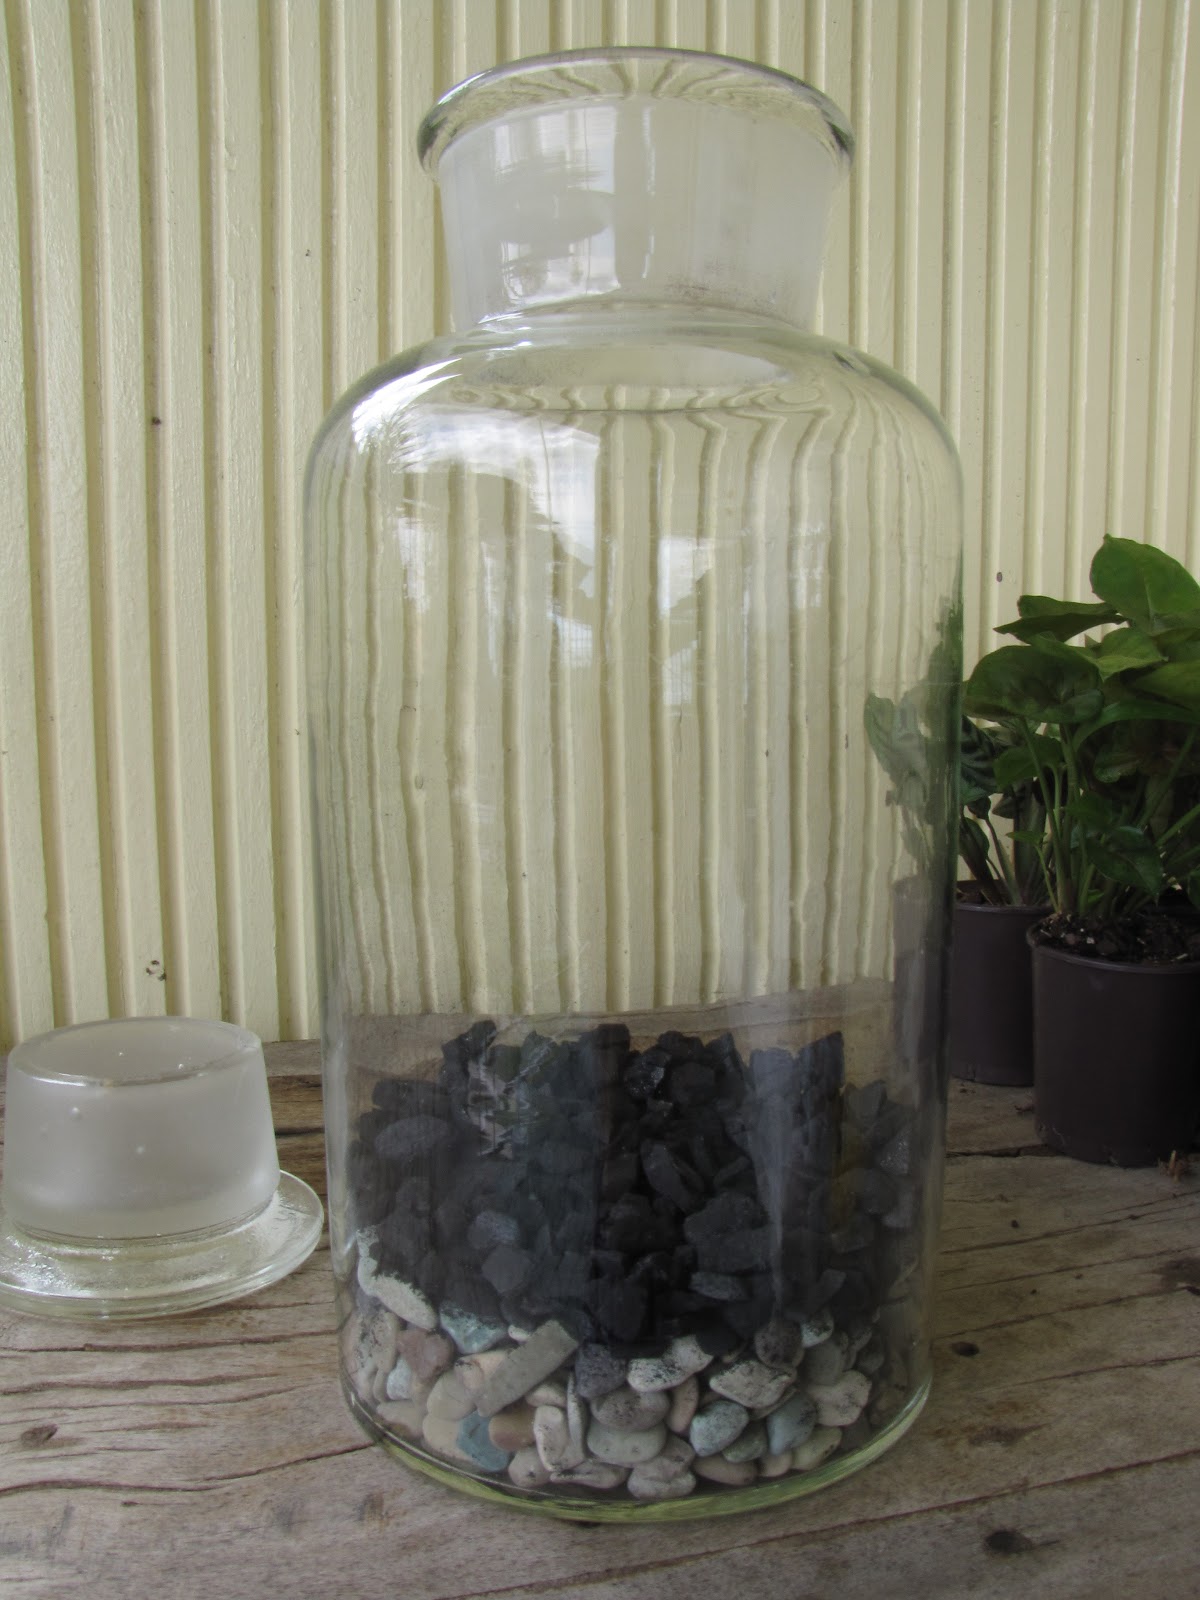
Make sure your chosen container is nice and clean then put a thin layer of pebbles down. If you have a tall jar (like I did) make a funnel from paper and shoot them straight down into the bottom. This totally stops you from freaking out that the jar is about to break cause the pebbles are bouncing around like kids on tartrazine.
Add a thin layer of charcoal. This will stop any nasties from developing as your terrarium matures into it's own self sufficient environment.
Now you have two choices. You can either go straight into adding the potting mix or you can put down a layer of moss. I chose to use some sphagnum moss as I really wanted a striking layered effect in the soil part of my terrarium. But it certainly won't hurt your terrarium if you decide to leave it out.
So, sphagnum moss...
Then soil. Be careful to keep your layers thin. Mine in the picture above are a little too thick and there ended up being hardly any room for the plants. I had to tip the lot out, sort it through (which took forever) and redo it all with thinner layers in the picture below. Much better!
Now the fun part - plants!
I used my hand in the bottle to get the plants into position and then a skewer to help move the soil and other decorative items around. This whole process took a bit of patience in getting it looking exactly how I wanted it to be, so take your time. You could also use a chopstick, long surgical tweezers or a long handled spoon to help with this part. I also used a spray bottle to squirt down any of the dirt which I happened to flick up onto the sides and then a tissue wrapped around the end of the skewer to clean down the inside of the glass when I was finished. Be careful not to overwater your terrarium - the water does not drain away like in a normal garden and you don't want to drown your plants.
Love that little snaily shell.
For now they are sitting on my side table in our living area, however they are eventually destined to end up on my craft room windowsill once I have redecorated that area. I heart them very much!
I've also been inspired by some beauties I've seen on the internet (apparently they were all the craze overseas a few years ago! How the heck did I miss that?) and the universe was definately telling me it was meant to be when I discovered this old book straight out of the 70's in my Mum's huge bookshelf.
I just love the line drawings and diagrams in it. They make me want to draw similar things and maybe even break out my colour pencils or watercolours. Which completely reminds me of Geninne's blog and the beautiful paintings of terrariums which she creates.
So if you'd like to create a terrarium of your own, there are a few things you'll need.
Glass containers (if they are small, make sure they are shallow enough that you reach and manipulate what's inside with your fingers, if they are tall, make sure your hand can fit through the opening!)
Pebbles or small rocks
Larger pebbles, shells, wood pieces, plastic animals - whatever takes your fancy to accessorise your terrarium
Charcoal (garden supply or aquarium supply shops will have this)
Peat or Sphagnum Moss (optional)
Potting mix
Small plants
Make sure your chosen container is nice and clean then put a thin layer of pebbles down. If you have a tall jar (like I did) make a funnel from paper and shoot them straight down into the bottom. This totally stops you from freaking out that the jar is about to break cause the pebbles are bouncing around like kids on tartrazine.
Add a thin layer of charcoal. This will stop any nasties from developing as your terrarium matures into it's own self sufficient environment.
Now you have two choices. You can either go straight into adding the potting mix or you can put down a layer of moss. I chose to use some sphagnum moss as I really wanted a striking layered effect in the soil part of my terrarium. But it certainly won't hurt your terrarium if you decide to leave it out.
So, sphagnum moss...
Then soil. Be careful to keep your layers thin. Mine in the picture above are a little too thick and there ended up being hardly any room for the plants. I had to tip the lot out, sort it through (which took forever) and redo it all with thinner layers in the picture below. Much better!
Now the fun part - plants!
I used my hand in the bottle to get the plants into position and then a skewer to help move the soil and other decorative items around. This whole process took a bit of patience in getting it looking exactly how I wanted it to be, so take your time. You could also use a chopstick, long surgical tweezers or a long handled spoon to help with this part. I also used a spray bottle to squirt down any of the dirt which I happened to flick up onto the sides and then a tissue wrapped around the end of the skewer to clean down the inside of the glass when I was finished. Be careful not to overwater your terrarium - the water does not drain away like in a normal garden and you don't want to drown your plants.
For now they are sitting on my side table in our living area, however they are eventually destined to end up on my craft room windowsill once I have redecorated that area. I heart them very much!
Wednesday, September 15, 2010
This Week At Lillabilly...
Harvest time! Got any good green bean recipes? We've picked 3.1 kilos of beans so far and there's still more coming!!
Filling up the cookie jar...five different sorts of jam drop are definately evidence that there is waaaay too much jam in my fridge.
Don't you love plants that take care of themselves? Our king orchid (Dendrobium Tarberi) minds it's own business hanging out in our bottlebrush tree, then rewards us our neglect with this...
As well, I've been having a good Spring clean. There are so many vacuum bags of Miss Five's outgrown clothes that I could start building a whole new house with them. Or maybe just a cubby.
Also, from the looks of this photo I possibly need to spring clean my shoes as well.
What's happening at your place this week? I hope you are having a nice one!
Filling up the cookie jar...five different sorts of jam drop are definately evidence that there is waaaay too much jam in my fridge.
Don't you love plants that take care of themselves? Our king orchid (Dendrobium Tarberi) minds it's own business hanging out in our bottlebrush tree, then rewards us our neglect with this...
As well, I've been having a good Spring clean. There are so many vacuum bags of Miss Five's outgrown clothes that I could start building a whole new house with them. Or maybe just a cubby.
Also, from the looks of this photo I possibly need to spring clean my shoes as well.
What's happening at your place this week? I hope you are having a nice one!
Labels:
Edibles,
Flowers,
Garden,
Reorganisation and Redecoration,
This Week,
Vegetables
Tuesday, August 3, 2010
Strawberry Fields Forever
Look! My strawberry plants are flowering and beginning to produce berries! Hooray!
I love strawberries. Now I'm off to make strawberry icecream for Miss Five (and myself!) with some awesome berries I picked up at the farmers markets this weekend. Yuuuuuuuuuum!!!
Thursday, July 15, 2010
How Does My Garden Grow...And The Best Pie Recipe Ever.
Well, now that the school holiday madness is over I can finally get back to some blog love!
Even though it's the middle of winter here, my vegetable patch is coming along quite nicely right now with a multitude of healthy deliciousness just waiting to ripen or to be picked and eaten.
Growing up with migrant parents from farming backgrounds who've always grown their own foods, I've always known that the stuff you grow yourself beats the stuff you buy from the supermarket, hands down, for quality, flavour and freshness. But having my own child now means that it's even more important to me that my family eat produce of the highest standard, not only to keep us healthy but to help little growing bodies be the best that they can be.
Growing up, I was always a little embarrassed that my parents grew their own vegetables. No one else I knew did this and who doesn't want to be the same as everyone else as a kid? I was already the little dark haired, dark eyed, olive skinned girl with the home-sewn uniform in a sea of blondes, light browns and red heads who only owned and ate store bought stuff. To then have a family that did things so differently from everyone else was quite mortifying. This feeling was magnified when I was older, out of home and only growing a few herbs of my own to use in cooking when a friend noticed them and jokingly (and slightly mockingly) told me I was going to turn out exactly like my parents. I was outraged!! There was no way I was going to be anything like my parents! Right? Right??
Flip to many years ahead, the global financial crisis, the growing cost of food and the big question marks over whether the things we eat which are covered with pesticides or highly processed or full of presevatives, additives, flavours and colours are really the best stuff to be putting in our bodies and giving to our families and I knew already which direction I would take. So I took it. And then, suddenly, the things which my family had been doing for decades became the latest trend and everyone was on the homegrown, homecooked, homemade wagon.
I visited my friend (the one I mentioned earlier) not so long back and upon glancing out her back door noticed a big plastic container with some struggling, wilty herbs growing in dry, poor soil.
"Hey!" I said "You're growing stuff!"
"Yeah," she replied "Herbs are just so expensive so I thought I'd try to grow my own. But they arn't really doing much and I don't know why."
I knew why. I knew exactly why. And so I told her what to do.
"Thanks!" she said brightly. "I'll try that out!"
And in that very moment the realisation came rushing home, striking me completely and fully out of the blue. I was never, ever prouder than that precise moment, to be exactly like my parents.
Anyway, now you know a little about the background behind why I grow things, here's a small sample of what's happening in my garden right now.
I pulled up these little beauties this morning, they will be lovely with barbequed morrocan chicken kebabs and couscous tonight. These guys can easily grow three or four times bigger than this but I didn't thin the crop out when I planted them and as they are starting to get quite crowded, the smaller ones needed some growing space, so up came these! Besides, they are sooooo tender and flavoursome when they are babies!!
Some developing pea pods, climbing bean plants beginning their ascent and green truss tomatoes. We have a resident possum who likes to sample the tomatoes once they begin to ripen. I can't ever leave them for just one extra day because I will always come out the next morning to discover a big chunk out of the ripest side. Naughty possum! As a result I pick them the moment they begin to blush and they ripen beautifully on my kitchen bench.
Nasturtiums growing in amongst the vegetables. Both petals (which I also have growing in red and yellow) and leaves can be used in salads and have a peppery taste. My daughter loves the leaves of the plant in the top photo because "it looks just like someone painted them!" Garden faries perhaps? Shame they don't chase the possum away!
Cos and mignonette lettuce varieties and the biggest english spinich leaves I've ever grown!
And lots and lots of silverbeet.
This is about the third crop of silverbeet I've had this winter. I always used to hate it with a passion as a child, mostly because it would be served simply steamed...bleh! I couldn't really imagine eating it that way even as a grown up. My most favourite way now is in a pie with lots of cheese, perhaps not the least fattening way but then, I like to think that I've earnt it after all the hard work that goes into growing all my veges in the first place. If you would like to try it out, here's the recipe. I really can't take credit for it as although I've changed it slightly, it's pretty much right off the side of the fillo pastry box (thanks Pampas!) but of all the recipes I've tried, it's been the absolute best. Yum!
INGREDIENTS
20 Sheets Fillo pastry
1 large bunch Silverbeet with stalks, washed and finely chopped
2 spring onions, finely chopped
2 tbsp chopped mint
2 tbsp chopped parsley
1/4 tsp ground nutmeg
2 eggs
125g fetta cheese
125g ricotta cheese
60g parmesan cheese, grated
black pepper
olive oil spray
poppy or sesame seeds
METHOD
1. Cook the silverbeet by placing it in a lidded saucepan on medium heat and stir occasionally. Do not add water as the silverbeet will develop it's own water as it cooks. Drain well (I like to put it in a large sieve and press it with a spoon to get out all the liquid). Add onions, herbs, nutmeg, eggs, fetta, parmesan and pepper. Mix well.
2. Lightly oil a 26cm dia quiche dish and also spray first 10 sheets of fillo pastry lightly, arranging in dish to cover base and sides.
3. Spoon the filling into the pastry. Spray and layer the remaining pastry on top of the filling, folding the edges in to give a ruffled finish. Sprinkle top with seeds of your choice.
4. Bake in a preheated oven (170 deg fan forced/ 190 deg conventional) for forty minutes or until golden.
Here it is with my very own peas, corn and carrots (which have been coated with honey from a local grower). I'm pretty proud to say that not only the silverbeet, but the spring onions, mint and parsley in the pie also came from my garden. Oh and the eggs in the pie were free range, organic, jumbo sized ones from our local farmers markets. We will have our own chickens one day, but until then the farmers markets ones are brilliant and so much better (and cheaper!) than anything I could buy from the supermarket. Also, for those of you who have an oven as dodgy as mine, you may want to cover the outer edge of the pie in aluminium foil for the first thirty minutes and uncover to brown in the last ten. If I don't do this, the ruffled edge burns to a crisp!!
Enjoy!
Even though it's the middle of winter here, my vegetable patch is coming along quite nicely right now with a multitude of healthy deliciousness just waiting to ripen or to be picked and eaten.
Growing up with migrant parents from farming backgrounds who've always grown their own foods, I've always known that the stuff you grow yourself beats the stuff you buy from the supermarket, hands down, for quality, flavour and freshness. But having my own child now means that it's even more important to me that my family eat produce of the highest standard, not only to keep us healthy but to help little growing bodies be the best that they can be.
Growing up, I was always a little embarrassed that my parents grew their own vegetables. No one else I knew did this and who doesn't want to be the same as everyone else as a kid? I was already the little dark haired, dark eyed, olive skinned girl with the home-sewn uniform in a sea of blondes, light browns and red heads who only owned and ate store bought stuff. To then have a family that did things so differently from everyone else was quite mortifying. This feeling was magnified when I was older, out of home and only growing a few herbs of my own to use in cooking when a friend noticed them and jokingly (and slightly mockingly) told me I was going to turn out exactly like my parents. I was outraged!! There was no way I was going to be anything like my parents! Right? Right??
Flip to many years ahead, the global financial crisis, the growing cost of food and the big question marks over whether the things we eat which are covered with pesticides or highly processed or full of presevatives, additives, flavours and colours are really the best stuff to be putting in our bodies and giving to our families and I knew already which direction I would take. So I took it. And then, suddenly, the things which my family had been doing for decades became the latest trend and everyone was on the homegrown, homecooked, homemade wagon.
I visited my friend (the one I mentioned earlier) not so long back and upon glancing out her back door noticed a big plastic container with some struggling, wilty herbs growing in dry, poor soil.
"Hey!" I said "You're growing stuff!"
"Yeah," she replied "Herbs are just so expensive so I thought I'd try to grow my own. But they arn't really doing much and I don't know why."
I knew why. I knew exactly why. And so I told her what to do.
"Thanks!" she said brightly. "I'll try that out!"
And in that very moment the realisation came rushing home, striking me completely and fully out of the blue. I was never, ever prouder than that precise moment, to be exactly like my parents.
***
Anyway, now you know a little about the background behind why I grow things, here's a small sample of what's happening in my garden right now.
I pulled up these little beauties this morning, they will be lovely with barbequed morrocan chicken kebabs and couscous tonight. These guys can easily grow three or four times bigger than this but I didn't thin the crop out when I planted them and as they are starting to get quite crowded, the smaller ones needed some growing space, so up came these! Besides, they are sooooo tender and flavoursome when they are babies!!
Some developing pea pods, climbing bean plants beginning their ascent and green truss tomatoes. We have a resident possum who likes to sample the tomatoes once they begin to ripen. I can't ever leave them for just one extra day because I will always come out the next morning to discover a big chunk out of the ripest side. Naughty possum! As a result I pick them the moment they begin to blush and they ripen beautifully on my kitchen bench.
Nasturtiums growing in amongst the vegetables. Both petals (which I also have growing in red and yellow) and leaves can be used in salads and have a peppery taste. My daughter loves the leaves of the plant in the top photo because "it looks just like someone painted them!" Garden faries perhaps? Shame they don't chase the possum away!
Cos and mignonette lettuce varieties and the biggest english spinich leaves I've ever grown!
And lots and lots of silverbeet.
This is about the third crop of silverbeet I've had this winter. I always used to hate it with a passion as a child, mostly because it would be served simply steamed...bleh! I couldn't really imagine eating it that way even as a grown up. My most favourite way now is in a pie with lots of cheese, perhaps not the least fattening way but then, I like to think that I've earnt it after all the hard work that goes into growing all my veges in the first place. If you would like to try it out, here's the recipe. I really can't take credit for it as although I've changed it slightly, it's pretty much right off the side of the fillo pastry box (thanks Pampas!) but of all the recipes I've tried, it's been the absolute best. Yum!
SILVERBEET AND THREE CHEESE PIE
INGREDIENTS
20 Sheets Fillo pastry
1 large bunch Silverbeet with stalks, washed and finely chopped
2 spring onions, finely chopped
2 tbsp chopped mint
2 tbsp chopped parsley
1/4 tsp ground nutmeg
2 eggs
125g fetta cheese
125g ricotta cheese
60g parmesan cheese, grated
black pepper
olive oil spray
poppy or sesame seeds
METHOD
1. Cook the silverbeet by placing it in a lidded saucepan on medium heat and stir occasionally. Do not add water as the silverbeet will develop it's own water as it cooks. Drain well (I like to put it in a large sieve and press it with a spoon to get out all the liquid). Add onions, herbs, nutmeg, eggs, fetta, parmesan and pepper. Mix well.
2. Lightly oil a 26cm dia quiche dish and also spray first 10 sheets of fillo pastry lightly, arranging in dish to cover base and sides.
3. Spoon the filling into the pastry. Spray and layer the remaining pastry on top of the filling, folding the edges in to give a ruffled finish. Sprinkle top with seeds of your choice.
4. Bake in a preheated oven (170 deg fan forced/ 190 deg conventional) for forty minutes or until golden.
Here it is with my very own peas, corn and carrots (which have been coated with honey from a local grower). I'm pretty proud to say that not only the silverbeet, but the spring onions, mint and parsley in the pie also came from my garden. Oh and the eggs in the pie were free range, organic, jumbo sized ones from our local farmers markets. We will have our own chickens one day, but until then the farmers markets ones are brilliant and so much better (and cheaper!) than anything I could buy from the supermarket. Also, for those of you who have an oven as dodgy as mine, you may want to cover the outer edge of the pie in aluminium foil for the first thirty minutes and uncover to brown in the last ten. If I don't do this, the ruffled edge burns to a crisp!!
Enjoy!
Subscribe to:
Posts (Atom)